
1/11/2024 Workshop Meeting

During this meeting, we discussed the frame and finalized plans for CAD and mechanical. First, we listed out every part that we wanted to discuss and finish:
- Base plate location - Top, top inset, or bottom
- Brace frames - Brace or no brace
- Electronics - Placement
- Battery - Upright or side
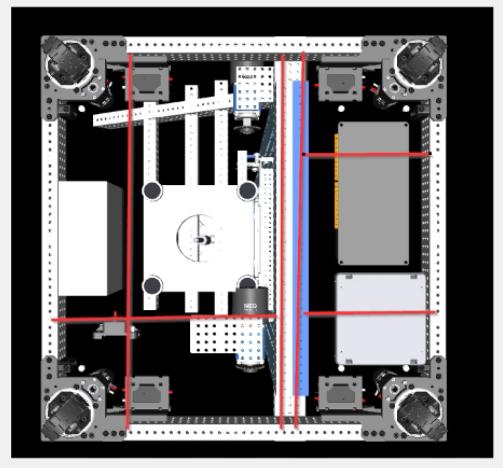
Base plate location
This part is critical to deciding where electronics are located and how mechanisms will be mounted. The purple boxes show how the electronics will be mounted.

On Bottom
This year's robot is less cluttered, allowing us to mount electronics without too much fuss. Electronics can be reached without needing to tip over the robot, and mechanisms can be easily mounted since no base plates cover the frame like in the top design. If the plate is on the bottom, we have more clearance for the cage to slide into our robot.
However, depending on our mechanisms, electronics can be more complex to reach. This can also increase difficulty in adding additional mechanisms due to space. Because mechanisms are in the way, electronics are less flexible in terms of changing where they are. A solution to this can be mounting the electronics upright on a vertical surface we have available. This design can be easy to modify but not easy to access, or vice versa.
On Top/Inset
This design requires electronics to be mounted upside down, so we'll cover them with a transparent plastic plate attached to the bottom with Velcro. This will allow us to quickly glance at and troubleshoot issues with any electronics when the robot is tilted on its side. All electronics will be reachable on the underside with motor controllers on top if necessary. Mechanisms can be bolted on top using the inset design because the plate will flush with the frame. With the electronics facing down, more space is allowed downwards; It is also more flexible in changing where they are.
However, we must tip the robot to look at or modify the electronics, a feat that's not great when we have an elevator. This design will make it more difficult for the cage to fit within the robot's middle because the plate is higher. A solution to this can be cutting out a section on one side of the robot to allow the cage to slide in.
Conclusion
Since the programming department needs the base as soon as possible, we'll design a basic frame just for driving and vision. When we have mechanisms ready, we will decide on a top or bottom design and see if either option is viable since we don't know how everything will fit.
Brace Frames
Brace
A brace is almost certainly needed for the elevator, and we can add another one to align the cage within our frame, as shown above.
When we add braces, we must consider their weight and the possibility of removing them. Braces will increase weight and can be difficult to disassemble when needed.
Electronics
Since this part depends on the base plate location and brace frames, we'll postpone this discussion until later.
Battery
The main thing to consider when deciding the battery location is where it will balance our robot's center of gravity. The option to set it upright or on its side depends on available space. However, upright will give us better CG and spacing.